


Cultivation
Building a Wick System: An Easy Way to Grow
This excerpt from Ed Rosenthal’s book hones in on one of the leading cultivator’s favorite ways to grow cannabis at home with a wick system.
Leading cannabis horticulture authority Ed Rosenthal delivers useful ideas for starting your own homegrow in his book “Ask Ed: Marijuana Success.” Here, we’ve featured an excerpt about creating a wick system. Are you ready to join Rosenthal in his backyard experiments?
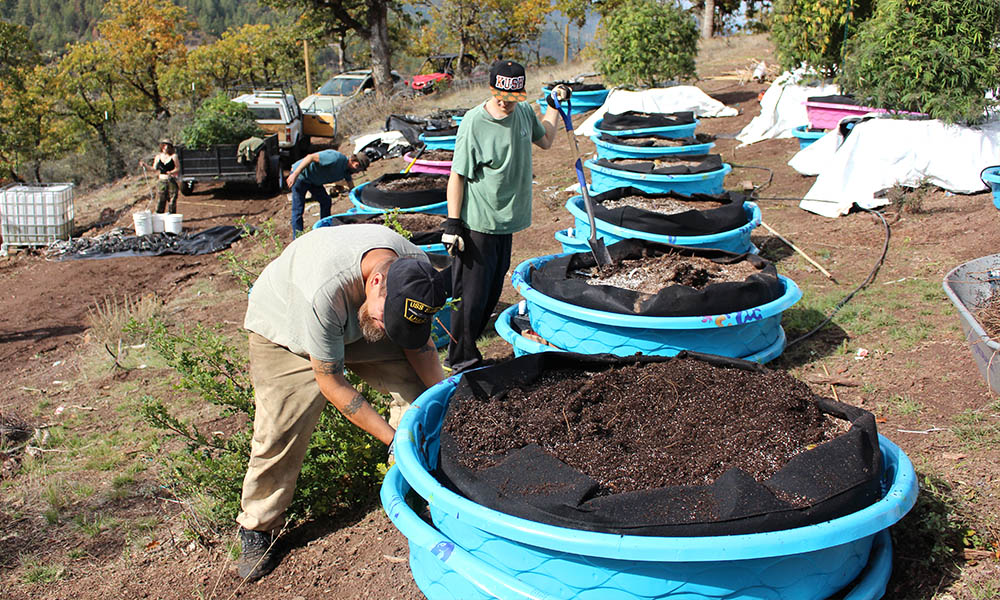
The wick container system is an easy way to garden because it’s self-watering and removes the uncertainty of when to water. It requires far less care than hand watering, and it’s simple, fast to assemble and inexpensive to set up.
The wick system is based on capillary action. One example of this is a tissue drawing up water from a puddle. The system we set up works on the same principle. Instead of tissue, we use braided nylon rope.

Equipment Needed to Build a Wick System
Starting from the bottom, we need a tray that’s at least three inches deep and wide enough to support the plant container. The wider the container, the deeper the tray should be. For instance, with a 6-foot container, I use a 10-inch-deep tray, but with small containers, the tray is only 3–5 inches deep.
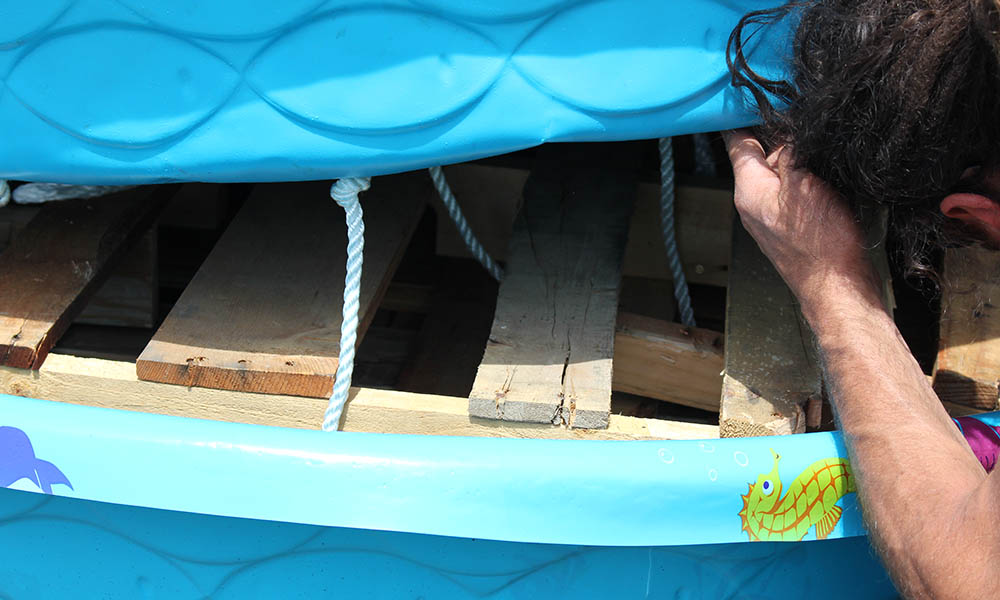
Next, we need some blocks to hold the container a few inches above the tray. Some possibilities are 2′ × 4′ or 4′ × 4′ boards, Styrofoam blocks, or an inverted plastic tray.
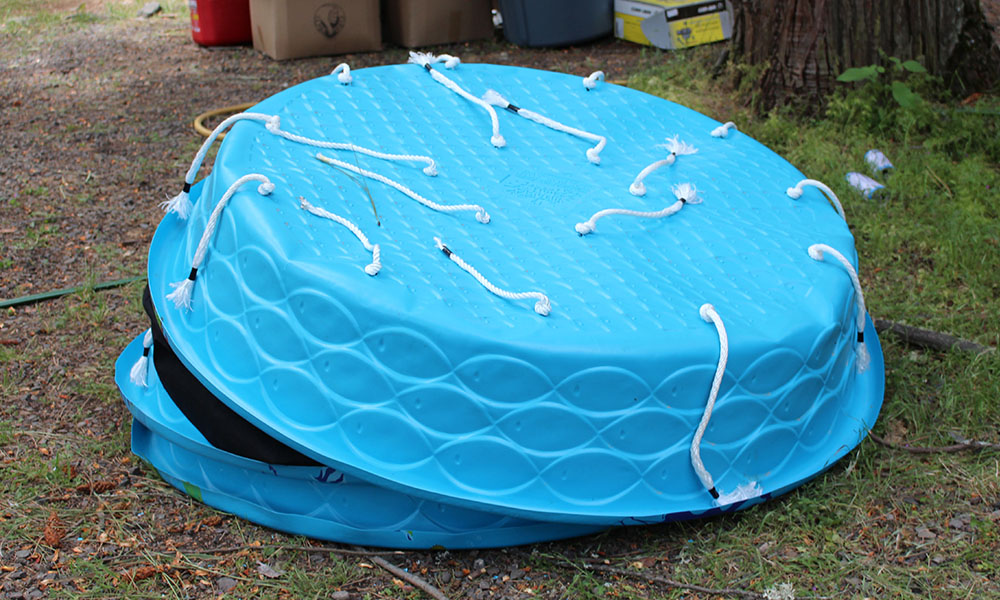
The container is next. Select the same size container that you would normally use. I’ve used this system with four-inch containers and eight-foot-wide soft containers.
Next is the wick. Nylon braided rope draws up water very well. These wicks last for a long time. I’ve used some more than 10 years. Select the wick size. The larger the container, the thicker the wick should be. A small container needs only a ¼-inch wick, while a large container, which is deeper than the small, can use wicks up to ¾ inches. Wider containers should have more wicks, so water is drawn across the entire bottom of the container by the wicks.
Next, the planting mix goes into the container. Once the water is drawn up the wick to the bottom of the soil level, the soil starts wicking it up vertically 8–10 inches. Many mixes are able to draw the moisture up, so try your favorite first. You probably have already seen the soil mix wicking when you watered a plant and excess water dripped into the tray below. A while later, the water disappeared as it was pulled up into the planting mix. The wick system works in the same way.

Installation
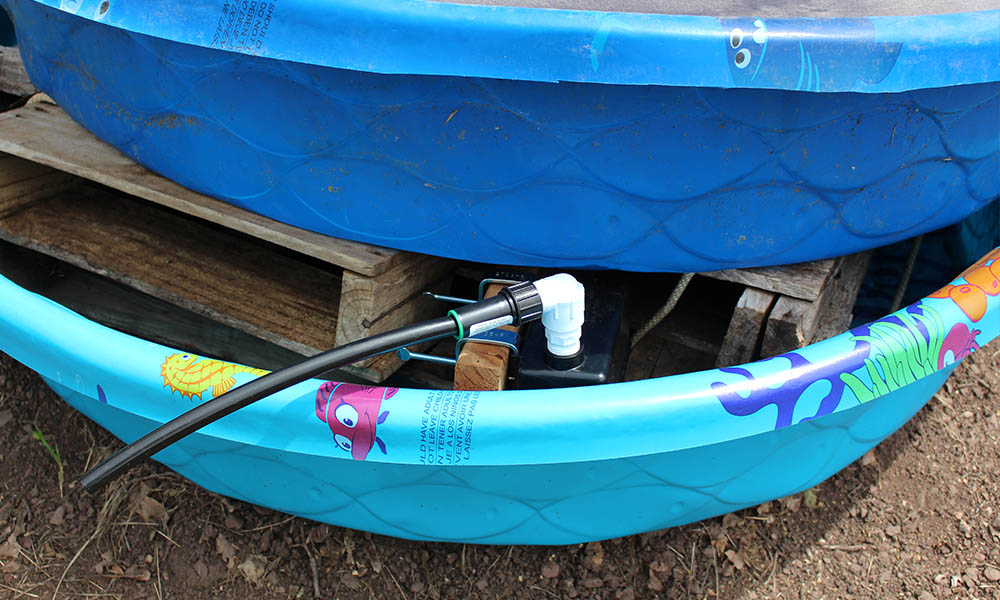
Place the wood or plastic supports in the tray.
Measure and cut the wick. It should start at the bottom of the tray, go through the drain hole in the container and stretch across the container bottom to the drainage hole on the other side and down to the bottom of the tray. The rope tends to fray at the ends. To prevent this, before you cut, use two twist ties, one for each end of the rope, to hold it in place.
If the container is wide, use two wicks, one in each set of two opposite holes. You may have to drill holes in wider containers, such as kiddie pools or wide trays. Figure that each wick drop covers about two square feet.
Fill the container with planting mix.
Maintenance
To start, add water to the container until it starts to drip into the tray.
Fill the tray with water.
Refill the tray as it loses water. You can also water the container from the top once in a while.
The planting mix absorbs water from the wick automatically as the plant uses it.
Options
This system can be automated. By placing a reservoir above the container level and placing a flush valve in the tray, the water level can be maintained for a longer time.
A number of trays can be connected to a reservoir so the whole garden is irrigated just by filling the reservoir. The advantage to this system is that each tray receives water only as it needs it.
Excerpted from “Ask Ed: Marijuana Success.”